How to Check and Change Your Oil

One of the most important things you can do to maintain your vehicle and keep it working efficiently is to check and change the oil.
Oil plays a vital role in the health of your engine. It lubricates the engine, reducing the friction and absorbing the heat created
by all of your engine’s internal parts moving against one another. If your engine doesn’t have enough oil (for instance, if the oil
level drops too low), or if the oil is too old and broken down to absorb heat, your engine could overheat, leaving you stranded on
the side of the road. No one wants that.
How to Check Your Oil
The good news is, you can check and even change your oil yourself. You should check your oil every couple of weeks. To check your oil,
first make sure your car is turned off and has sat for a little bit. You don’t want to be touching a hot engine. Next, pop the hood
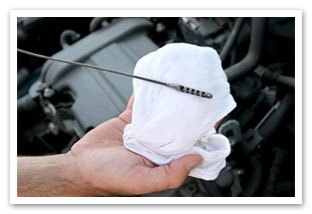
and pull out the oil stick (also known as the dipstick). In newer vehicles, the dipstick often has a yellow handle on it that says
“Engine Oil.” Your owner’s manual should have a map of the engine compartment that shows where the dipstick is located if you’re unsure.
After you pull out the dipstick, wipe off the oil on the stick and then re-insert it into the oil pan. Now remove it once more and look
closely for the oil line. The stick should be clearly marked to show what your oil level should be. Some dipsticks have two marks, one
that stands for the low or minimum, and one that stands for high or maximum. Your oil should be between these marks. If it’s below the
mark, you need to add oil.
When adding oil to your vehicle, make sure that you’re using the grade of oil recommended in the owner’s manual. You can purchase oil at a
service station or auto-parts store. Be careful when adding the oil. Adding too much oil is bad for the engine. Don’t go over the max
fill line. When you’re finished, be sure to fasten the oil filler cap back on.
How to Change Your Oil
Oil breaks down over time, so it’s necessary to change your oil to keep your engine working smoothly. It varies, but most manufacturers
recommend that you change your oil every 3,000 to 5,000 miles. You may need to consider changing your oil more frequently if:
- You drive your vehicle hard, with quick starts, heavy acceleration or high-speed driving.
- You live in an extremely hot or cold climate.
- You often drive on dirt roads.
- Your engine is old and burns oil.
- You frequently carry heavy loads.
You can take your car in to have its oil changed, or you can do it yourself. If you plan to do it yourself, there are a few things you will need:
- Fresh oil (use the grade of oil recommended in your vehicle’s owner’s manual)
- New oil filter
- Oil pan
- Oil filter wrench
- Funnel
- A hoist, ramp, or jack to elevate your vehicle
- Latex gloves
You can get these items from an auto-parts store or big-box retailer.
The first thing you’ll need to do is elevate your vehicle using a hoist, ramps, or jack stands. Be especially cautious during this step and
make sure the vehicle is securely lifted.
Next, to access the oil pan and filter, you need to remove the plastic undertray. You can do this with basic hand tools.
Now you’ll need to position your oil drain pan below the oil plug. Hold the drain plug and loosen it with a wrench. Remove it all the way.
Oil will begin to pour out as soon as you remove the plug.
Allow the oil to drain for about five minutes. Keep in mind that there will be A LOT of oil. Many cars have as much as a gallon in their crankcase.
Once the oil has finished draining, you’ll need to replace the oil filter. This is a small cylindrical device that’s screwed onto the engine.
You’ll need to loosen this with a wrench. Loosen it enough that oil starts to spill out of the top into your oil drain pan. When the flow
subsides, remove the filter completely. Be sure the old oil filter gasket is removed before you put on the new filter. The gasket is a thin
rubber ring. If this is not removed, it will keep your new filter from sealing properly.
After the new filter is on, put the drain plug back on and reinstall the undertray. Lower the car back to the ground.
Open the hood and remove the oil cap. You’ll use your funnel to fill the engine with the manufacturer’s indicated volume of oil.
Use the dipstick to verify that the oil is at the proper level. Voila! That’s it. You’re done.
Low Oil Pressure Warning Light
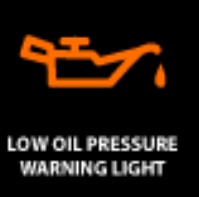
Keep an eye out for the Low Oil Pressure warning light on your dashboard. When this light stays on, it usually indicates low oil levels in your
engine’s crankcase. If you are driving when this light comes on, pull off the road, stop your vehicle, and let the car cool for a bit. Once your
engine has cooled off, check your engine’s oil level. Do not continue driving with the oil light on! If your engine has too little oil, it could
cause your engine to seize. Make sure the oil level is restored to the proper amount before driving.
Take a Course to Learn More
If you enjoyed this article and are interested in learning more about driving-related topics, you should check out our courses on www.safe2drive.com.
We offer courses in a variety of topics including Defensive Driving and Driver Education. In addition to teaching you how to be a safe driver, our courses
can help you dismiss a ticket, get your driver license, or even get an insurance discount. We also have courses specifically tailored to mature drivers (i.e., drivers
age 55 and older) for insurance discounts.